Common Guides
Autotile Tilemap
Tile Palette setup, grid cell size, drawing tilemaps, layering palettes, and sorting order for autotile maps.
Autotile Tilemap Guide
This guide explains the basic workflow for building an autotile map in Unity with Tile Palette. The screenshots are matched to the original PDF steps, and the red boxes mark the parts of the editor you should click or verify.
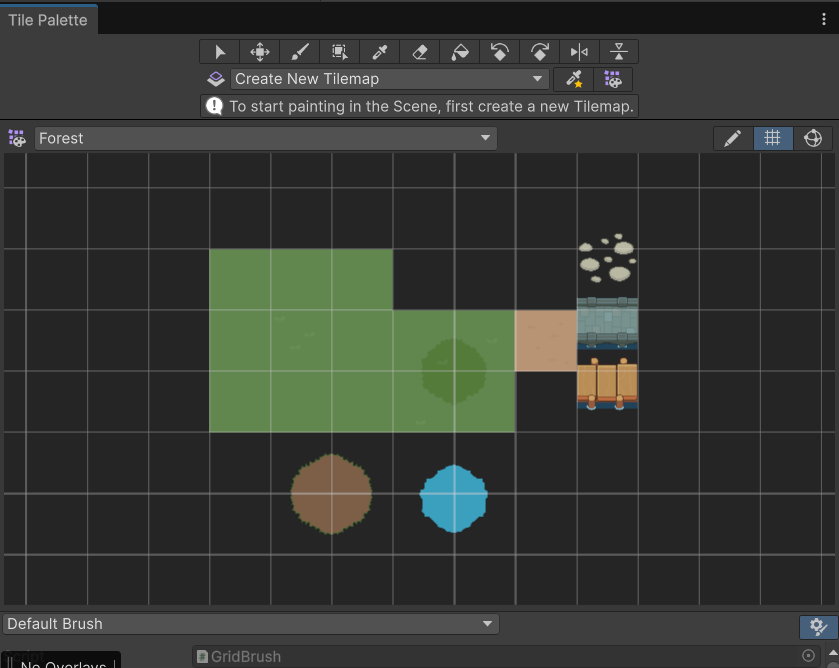
1. Open the Tile Palette window
From the Unity top menu, choose Window > 2D > Tile Palette.

The Tile Palette window is where you select tiles, create palettes, and place tiles onto a Tilemap in the Scene. Open this window before setting up the autotile workflow.
2. Create a new Tile Palette
In the Tile Palette window, open Create New Palette and create a new palette.
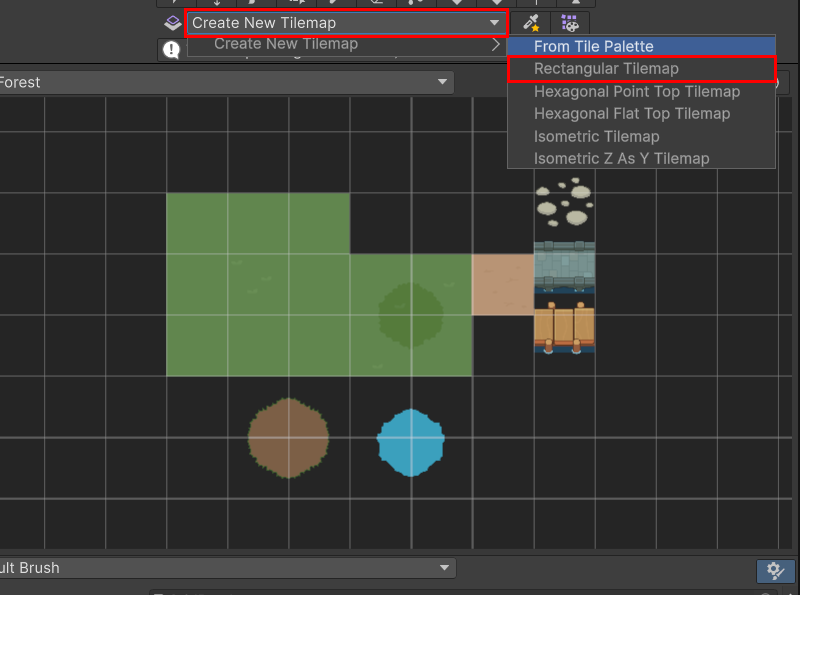
Choose the palette type that matches your project. For a standard 2D tilemap, use Rectangular Tilemap. If your map is hexagonal or isometric, choose the matching layout instead.
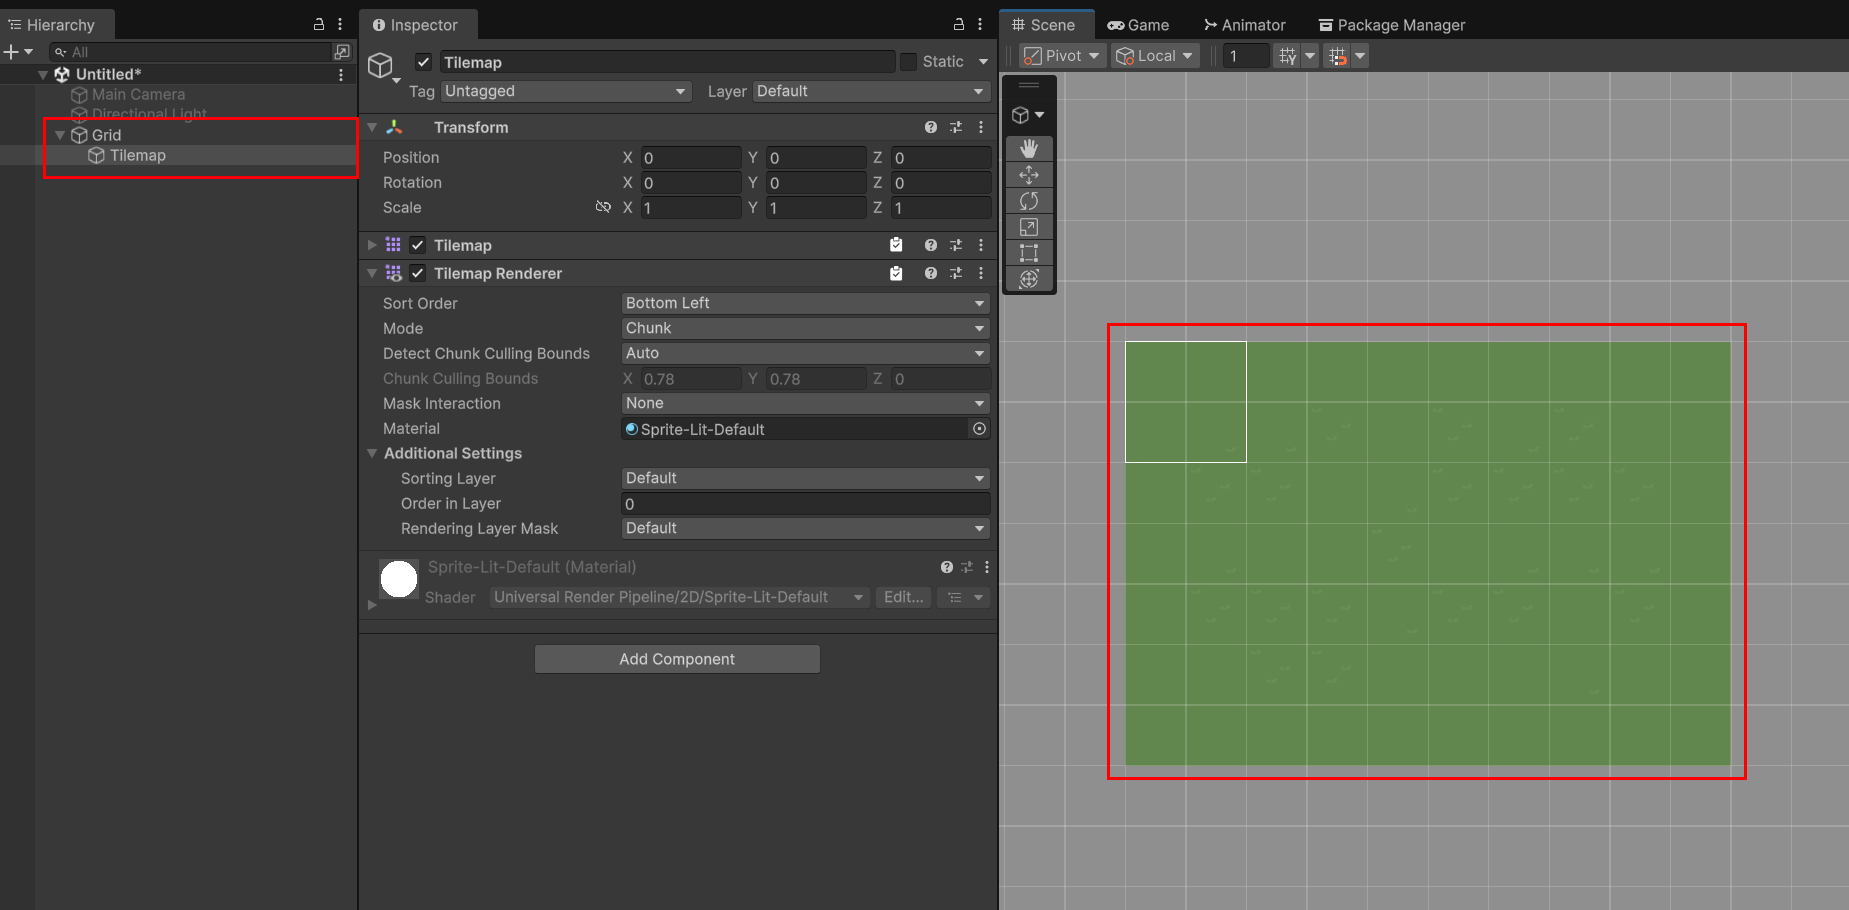
3. Check the Grid object
Confirm that the Hierarchy contains a Grid object with a Tilemap under it.
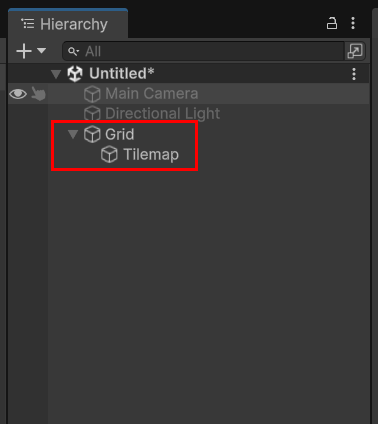
The Grid controls the base coordinates and cell size for the tilemap. The Tilemap is the layer where tiles are placed. If you use multiple layers, add more Tilemaps under the same Grid and separate them by role, such as ground, terrain, decoration, or foreground.
4. Set the Grid Cell Size
If the autotile image is based on 256px tiles, set the Grid Cell Size to 2.56, 2.56.

This value keeps the tile image size aligned with the project's Pixels Per Unit setup. If the cell size is incorrect, tiles may be offset from the grid, gaps may appear, or the Scene size may not match the palette preview.
5. Select a tile from the palette
In Tile Palette, confirm that the Brush tool is active, then select the tile you want to place.
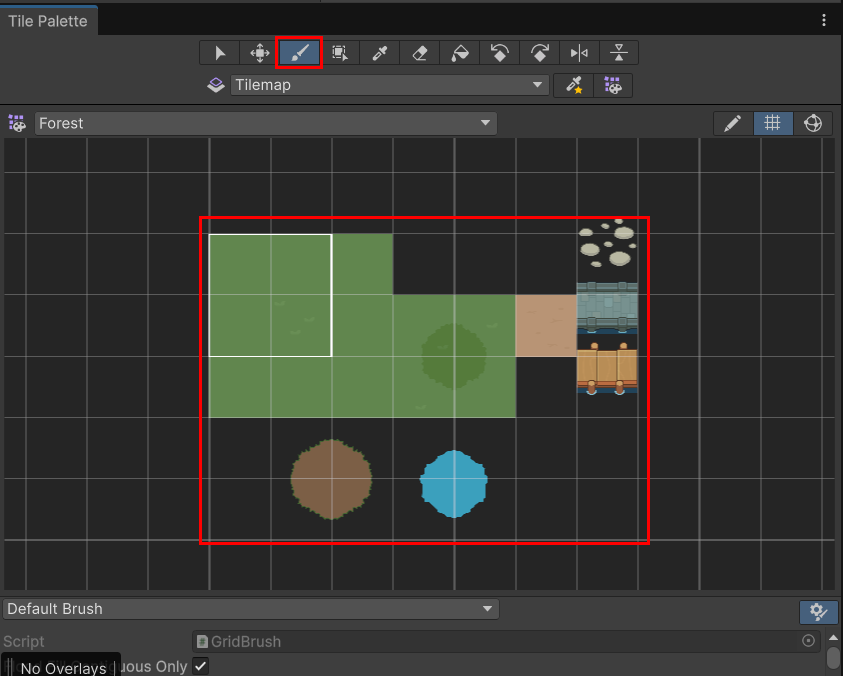
Use the tool area at the top to choose the placement tool, then select the tile image in the palette area. The selected tile can then be placed onto the Tilemap in the Scene view.
6. Place tiles on the first Tilemap
Select the target Tilemap in the Hierarchy, then place the tile onto the Scene grid.
If the wrong Tilemap is selected, tiles may be placed onto the wrong layer. When using multiple layers, always check the active Tilemap in the Hierarchy before placing tiles.
7. Add palettes and Tilemap layers for stacked maps
When needed, add more palettes or Tilemap layers to build the map in stacked sections.
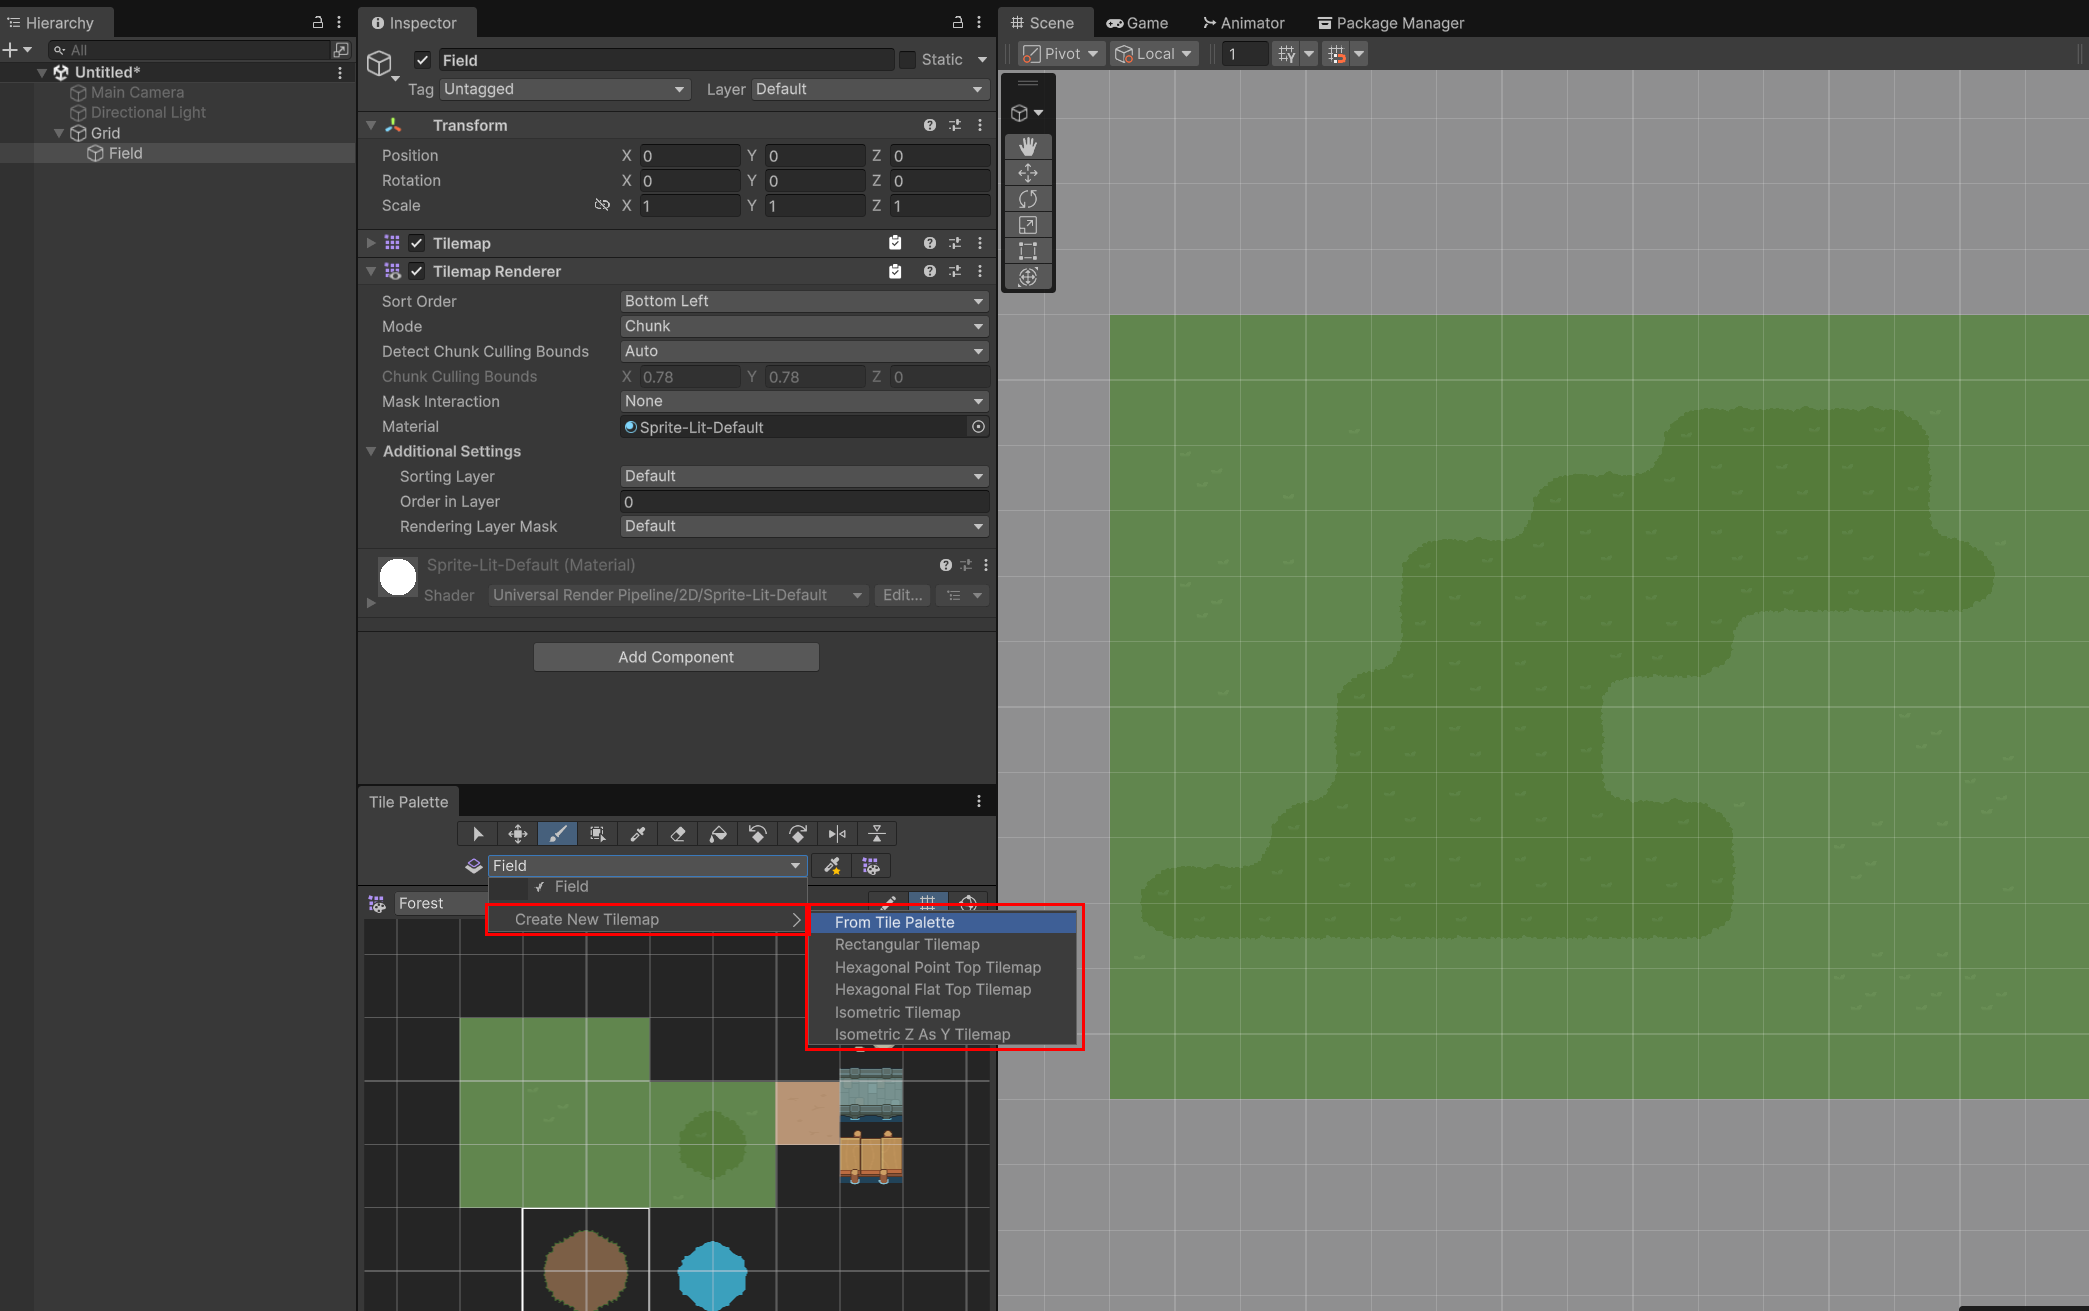
For example, base ground tiles can be placed on a lower layer, while hills or decorative tiles can be placed on a higher layer. Separating the map this way makes it easier to edit, hide, or reorder individual parts.
8. Set names and Order in Layer
Name each Tilemap by role and set Order in Layer so overlapping tiles render in the correct order.

A higher Order in Layer value renders in front. When water, ground, decoration, and foreground tiles overlap, keep both the layer names and sorting values organized.
Checklist
- Open the Tile Palette window.
- Create a new palette and choose the Tilemap type for your project.
- Confirm that the Grid Cell Size matches the tile image setup.
- Before placing tiles, check which Tilemap layer is selected.
- When using multiple layers, organize names and Order in Layer values.
- If tiles look misaligned, check both Grid Cell Size and the Sprite Pixels Per Unit.