Common Guides
2D Character (Spine)
Spine runtime setup, Spine license notice, URP material setup and customization for 2D character packs.
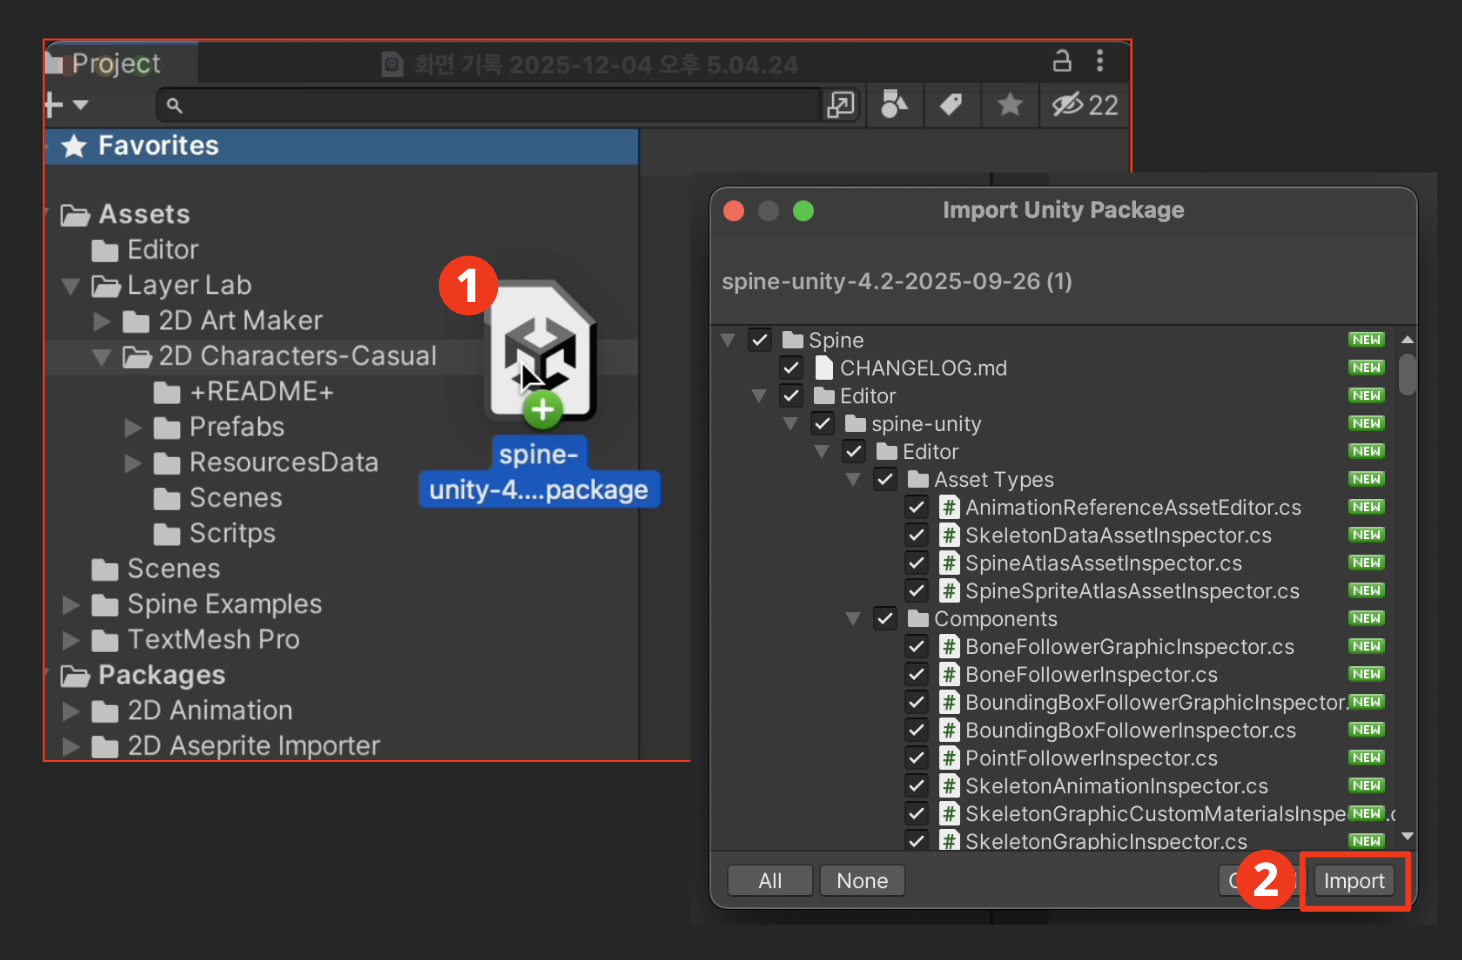
🔗 Spine Runtime Download
⚠️ Spine License Notice
This asset package contains animations created with Spine.
To play these animations in Unity, the
Spine-Unity runtime is required, which must be downloaded directly by the user from the official Spine website.
According to the official Spine Editor License (2.4 Requirements), including the runtime in your project requires a Spine Editor license.
Even for playback only, including the runtime triggers this requirement. Editing or creating new Spine content also requires an Editor license.
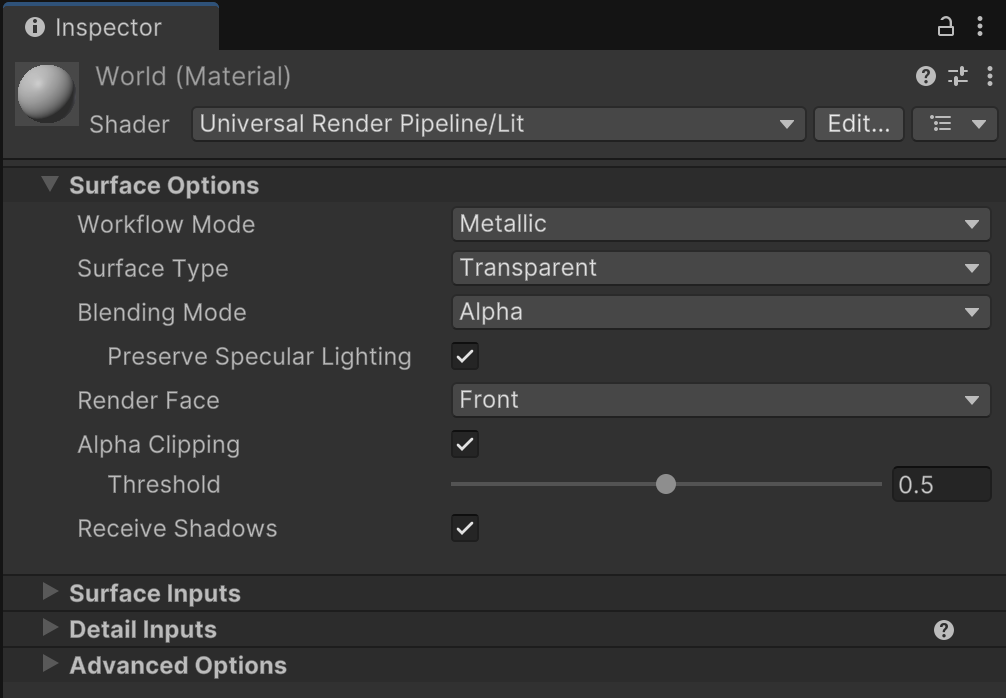
1. URP Material Setup (Optional)
2. Is it customizable?
The “2D Art Maker – Casual Character” asset is designed to work with the parts provided by us by default. Therefore, support for directly adding new parts such as additional weapons into the Art Maker interface is not included.
If you want to customize characters to better fit your game — for example, by adding new weapons or items — you can do so by modifying the original Spine source files provided with the asset.
Please note, this customization process requires a valid Spine Pro Licene
Weapon & Clothing Parts Addition Guide for 2D Art Maker (Spine Pro Required)
If you'd like to add weapon or clothing parts to the asset, please follow the steps below.
1. Open the original Spine file in the Spine editor.
2. Add the desired weapon or clothing parts.
3. Save the file as SkeletonData, overwriting the existing file.
4. Add thumbnail images matching each part into the PartsThumbnail folder.
5. Place the thumbnail images according to the corresponding item ID in the item thumbnail folder.
Useful Official Spine Guide Links